Register for our next webinar !

Custom fields allow you to add detailed information to the tasks of your network in a structured manner. There is an infinite number of use cases possible with the 6 predefined types that we offer.
Use case
In this article we propose three use cases to help you understand the custom fields:
- Add a custom field to estimate the duration of the tasks,
- Add a status on the tasks linked to a project,
- Add services concerned with management’s tasks
In a general sense, a custom field can be available on all the tasks of the network, or only in one or several workspaces.
Add a custom field to estimate the duration of tasks
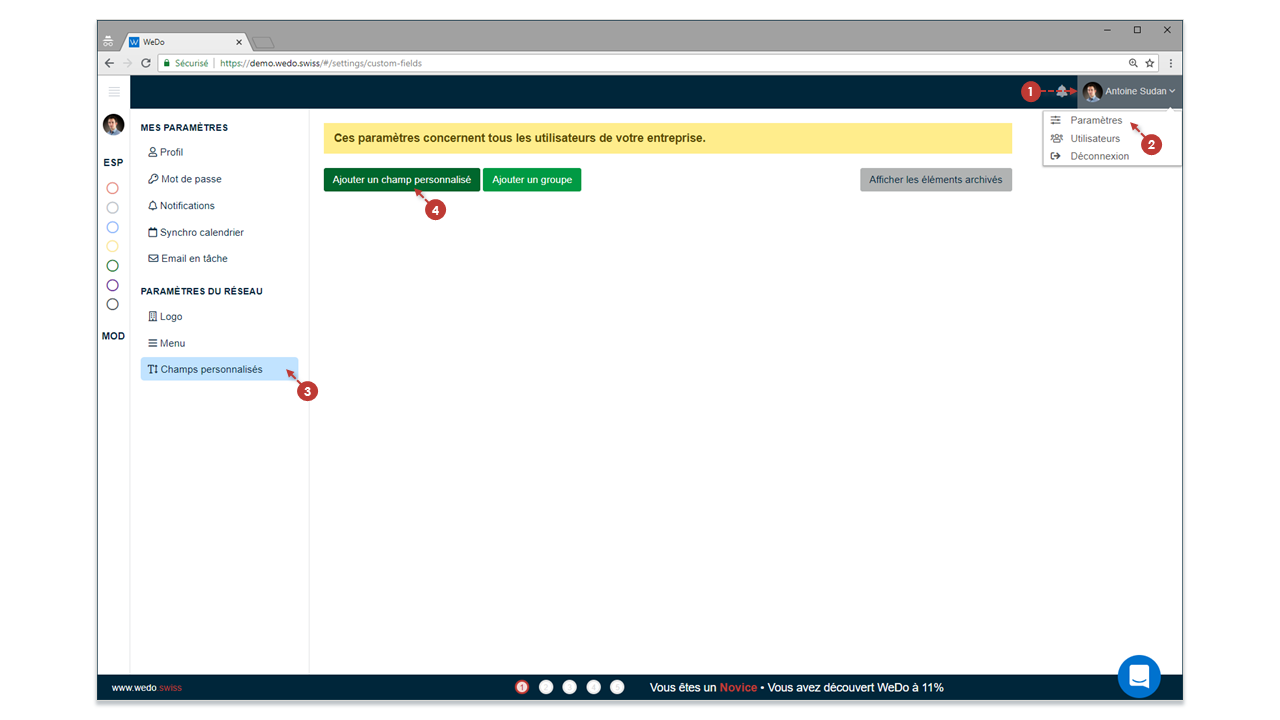
To create a new custom field, go to Profile > Settings > Custom fields tab. Then click Add custom field.
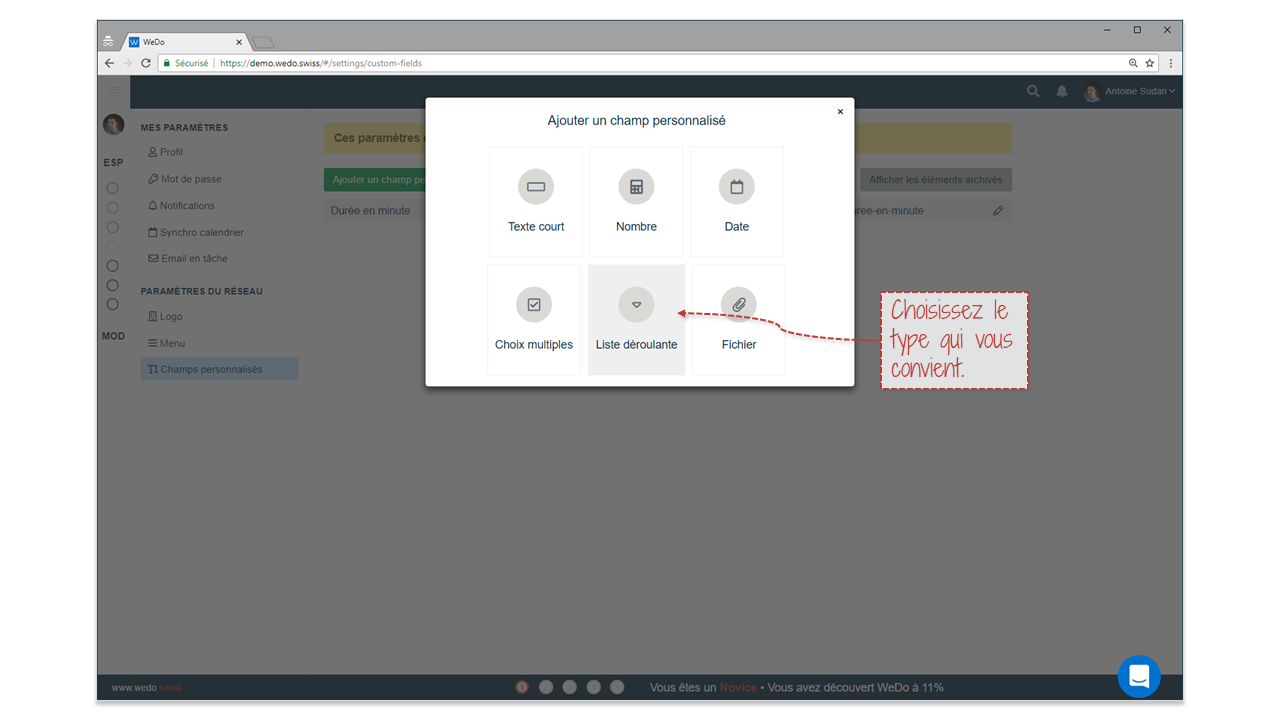
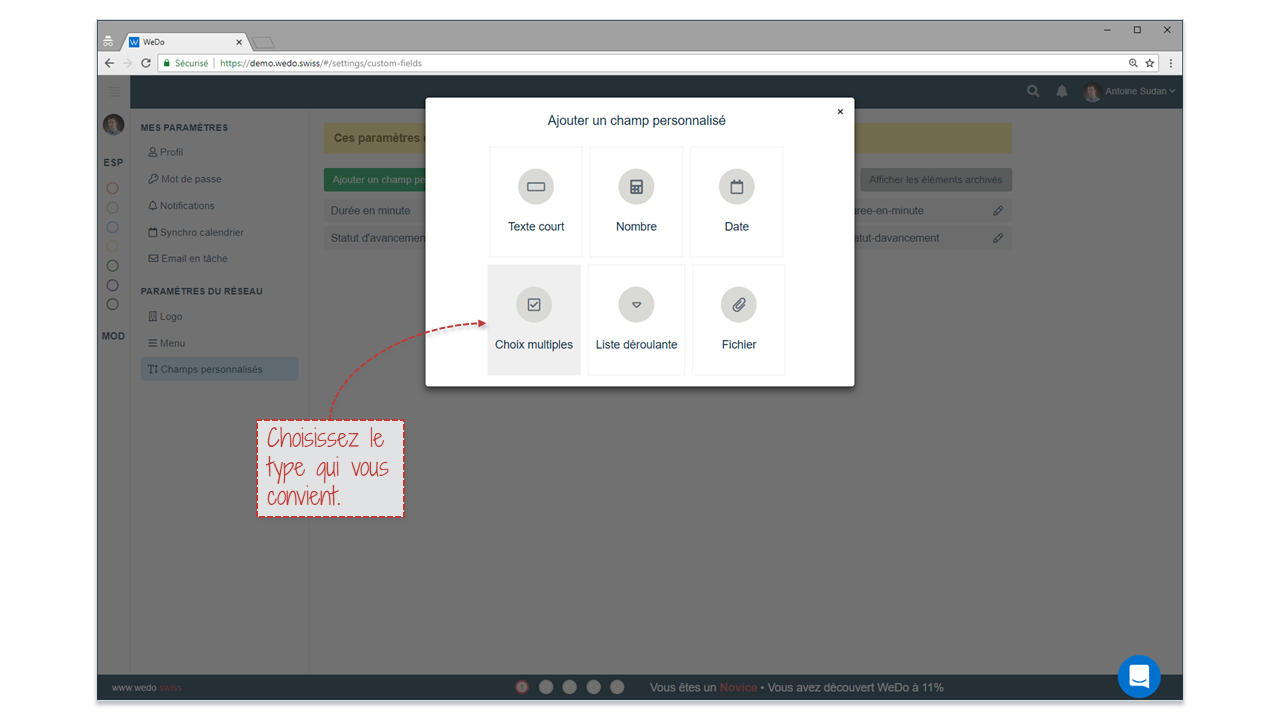
A window will pop up asking you to choose among six types of fields. To estimate the duration of tasks in minutes, you will need to select “Number”.

Enter a name for your custom field and choose an icon to represent it in the details pane of your tasks. You can then choose to make the custom field available on all your tasks, or if you only want it to be available in one or several workspaces.
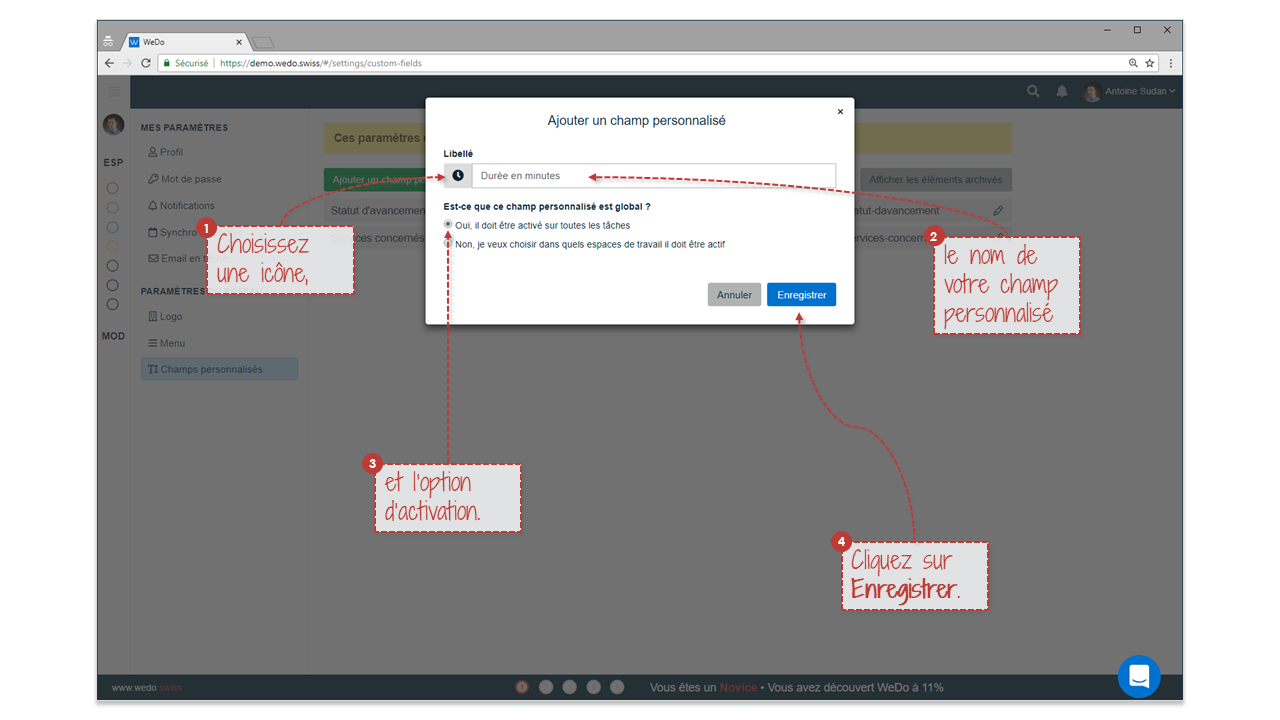
Then, click Save.
Next to each task of your network will now appear the field “Duration in minutes” in the details pane of the task, with the icon you have chosen:

Add a status on the tasks linked to a project
To create a new custom field, go to Profile > Settings > Custom field tab. Then click Add custom field.
For a status on the tasks of a project, the appropriate custom field will be “Dropdown list”.
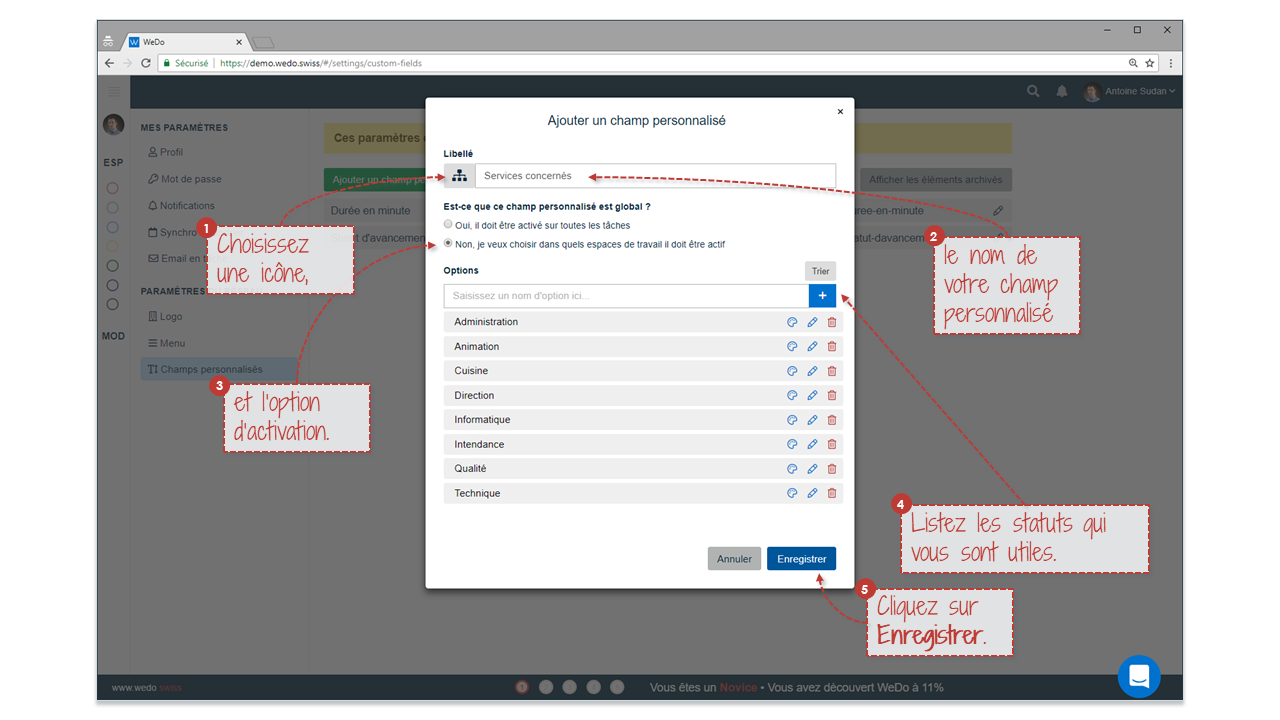
Enter a name for your custom field and choose an icon to represent it in the details pane of your tasks. Then select the second option: “No, I want to choose in which workspaces it’s available”.
You can then enter the different status that you would like to have in your project:

Note that you can choose a different color to represent each status.
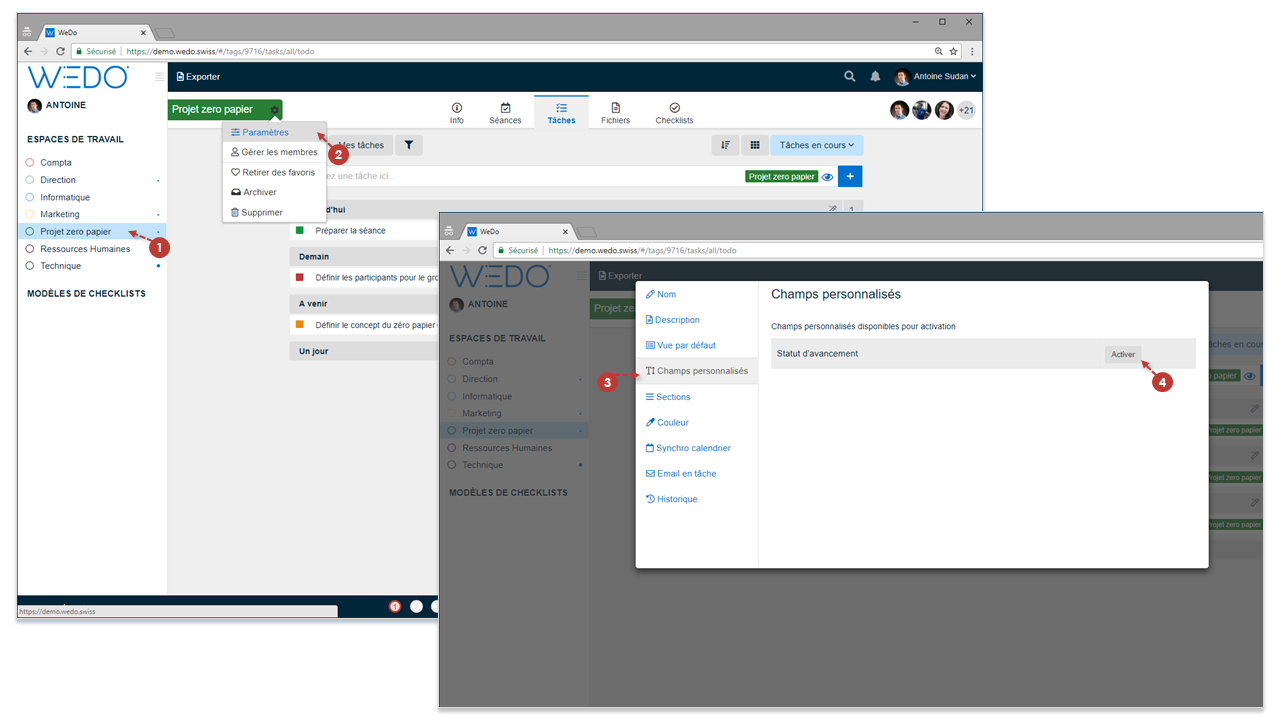
To activate the field in a workspace, you need to go to the settings of the workspace in question (here, it is Zero Paper Project) and select the Custom fields tab. The list of custom fields available for activation will appear. You can then choose to Activate the field that interests you for this project.
From now on, you can select the status of each shared tasks in your Zero Paper Project.
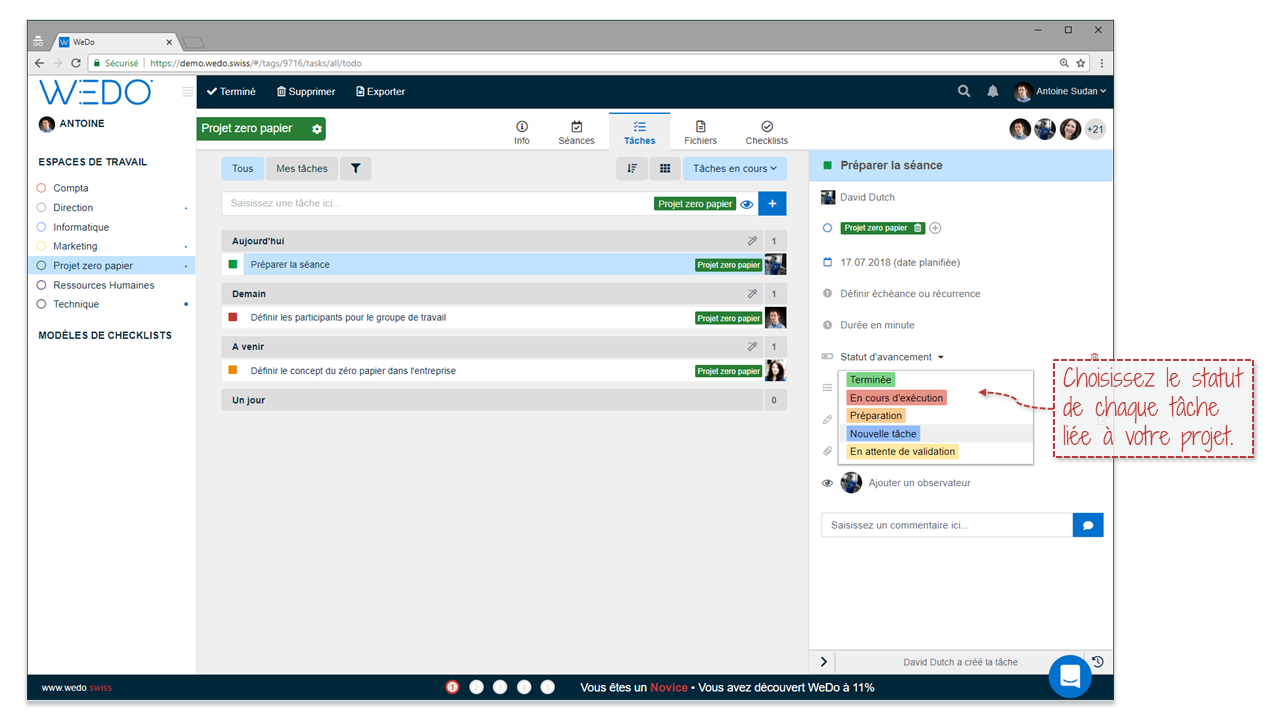
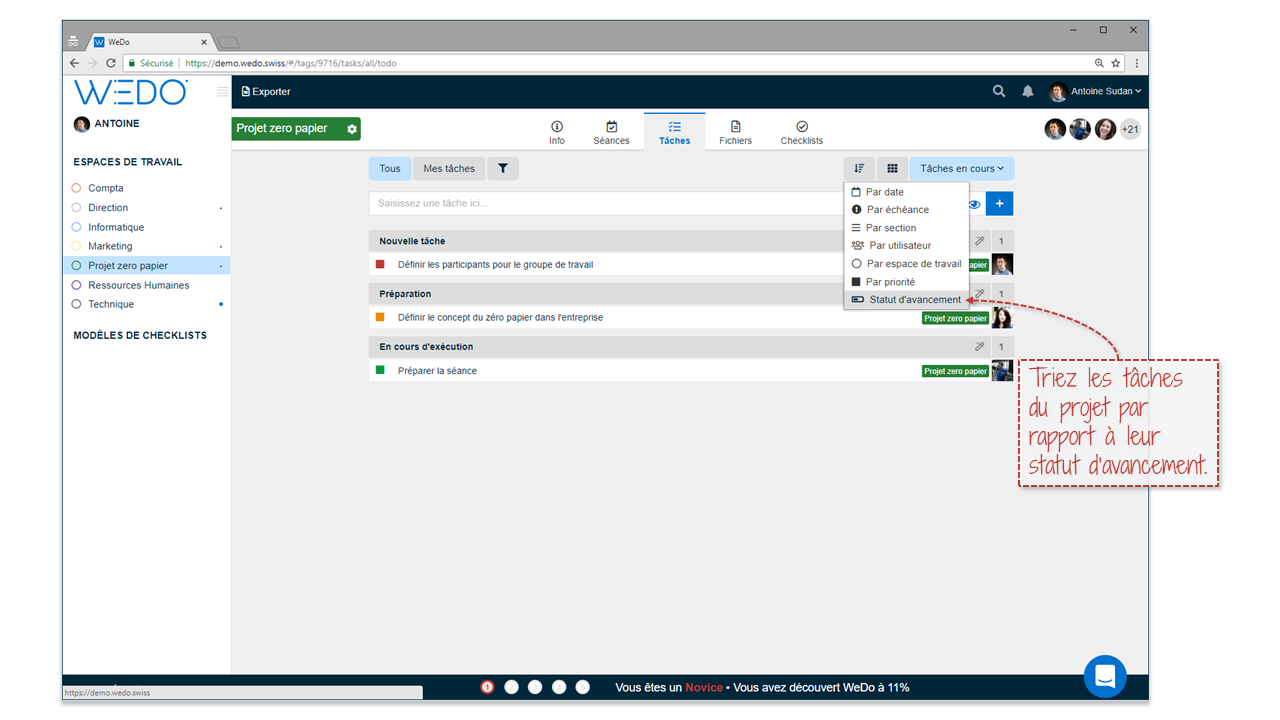
Note that you can also sort the tasks according to their status:
Add the services concerned with the management’s tasks
To create a new custom field, go to Profile > Settings > Custom field tab. Then click Add custom field.
Here, you will need to select “Multiple choice”.
Enter a name for your custom field and choose an icon to represent it in the details pane of your tasks. Then select the second option: “No, I want to choose in which workspaces it’s available”, enter the different “Services” and click Save.
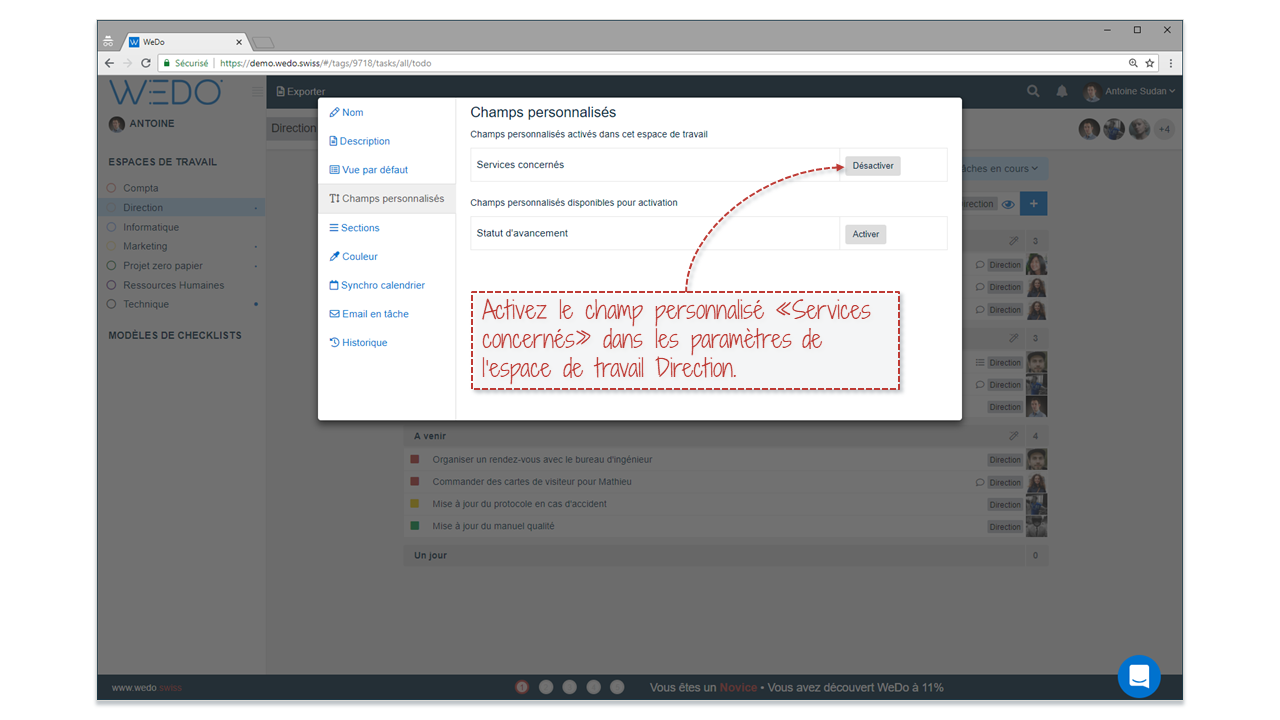
To activate the custom field in the Management workspace, you need to go to the settings of the workspace in question and select the Custom fields tab. The list of custom fields available for activation will appear. You can then choose to Activate the field that interests you for this workspace.
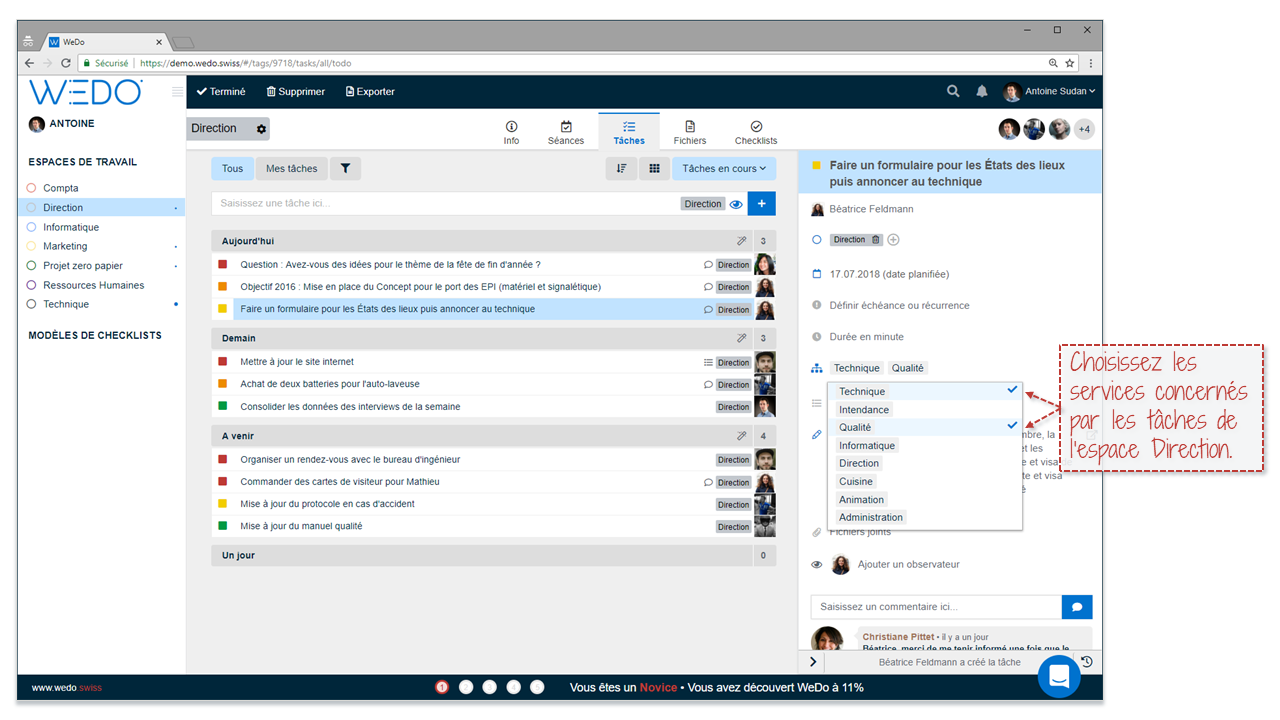
You now have the possibility to choose one or more services for each task that is in the Management workspace.
Sharing tasks and custom fields
If you share a task in a workspace, the available custom fields of the workspace will automatically appear in the details pane of the task. If you remove a task from a workspace, the custom fields will simply be masked. This flexible system offers you to share tasks that will remain intact and no data will be lost.
We can improve WEDO thanks to your feedbacks. Please let us know if you have any suggestions or ideas to improve and develop our tool.
Related posts
Get the latest tips sent straight to your inbox: Subscribe to our newsletter

Antoine Sudan